Essential Tips on Tattoo Healing Time - What to Consider
- Phantom Avenue
- Dec 19, 2025
- 10 min read

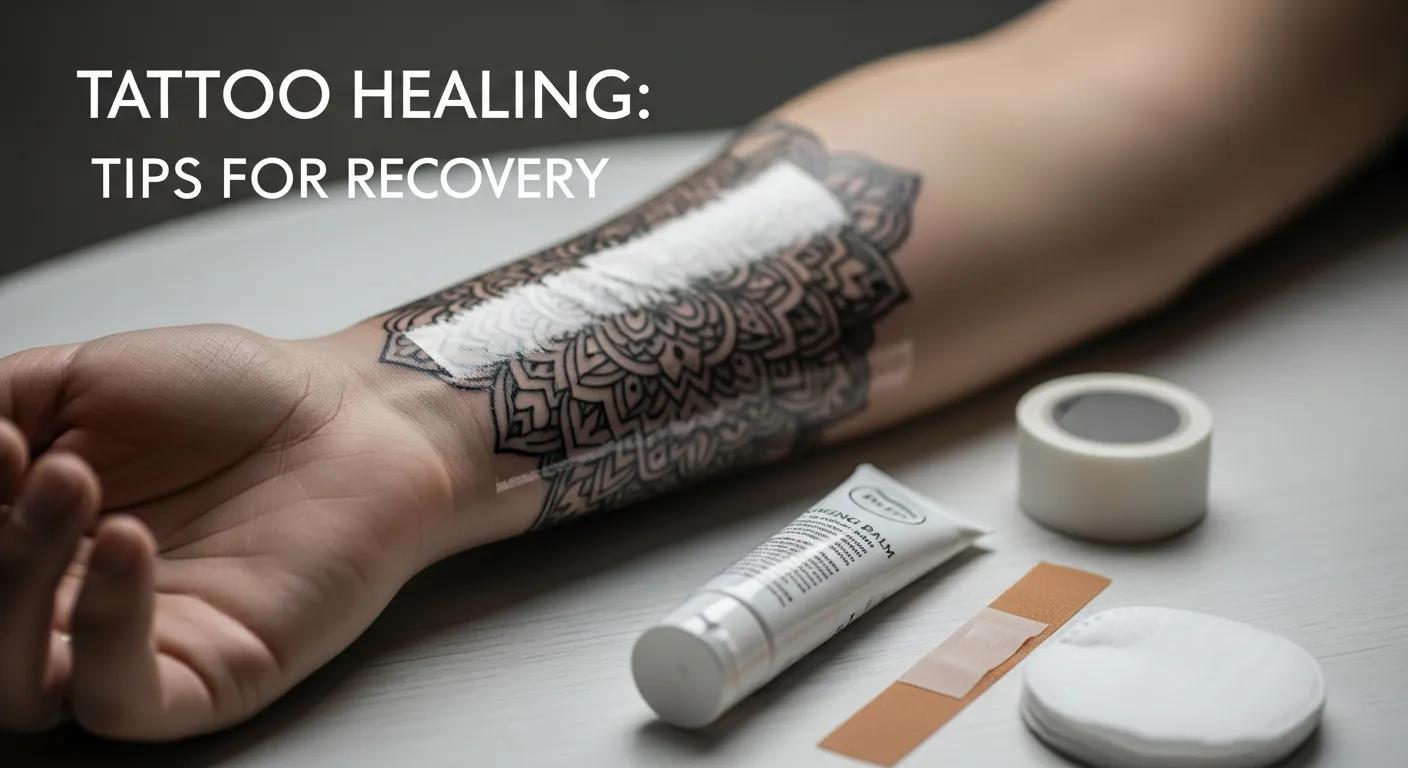
Tattoo Healing: Your Recovery Guide
Healing is your skin’s controlled response to getting inked: the surface seals over in a few weeks while deeper dermal remodeling — the part that locks pigment in place — can take several months. This guide breaks down realistic timelines, explains each healing stage, and gives clear, practical aftercare you can follow to keep your ink bright and lower the chance of problems. People often ask, “How long does a tattoo take to heal?” — short answer: surface healing is usually 2–3 weeks; full dermal healing commonly needs 3–6 months, depending on size, placement, session length, and your overall health. Consistent aftercare speeds recovery, prevents infections, and reduces scabbing and fading. Below you’ll find cleaning routines, activity limits, infection warning signs, pain-management tips, product suggestions, step-by-step care, easy-to-scan tables comparing stages and actions, and answers to common questions like why your tattoo itches or how to tell scabbing from normal peeling.
How Long Does a Tattoo Take to Fully Heal?
Full healing is a two-part process: the epidermis (surface) repairs first, then the dermis remodels and lets the ink settle. Surface healing usually completes in 2–3 weeks — redness fades and light peeling appears. Dermal healing is slower, typically 3–6 months, as collagen reorganizes and pigment settles. Placement (hands vs. torso), tattoo size, session length, circulation, immune health, and the artist’s technique all affect timing — which is why two tattoos can heal at different rates. Knowing these stages sets realistic expectations and helps you follow the right aftercare to protect color and avoid complications; the sections below walk through typical stages and how placement changes the timeline.
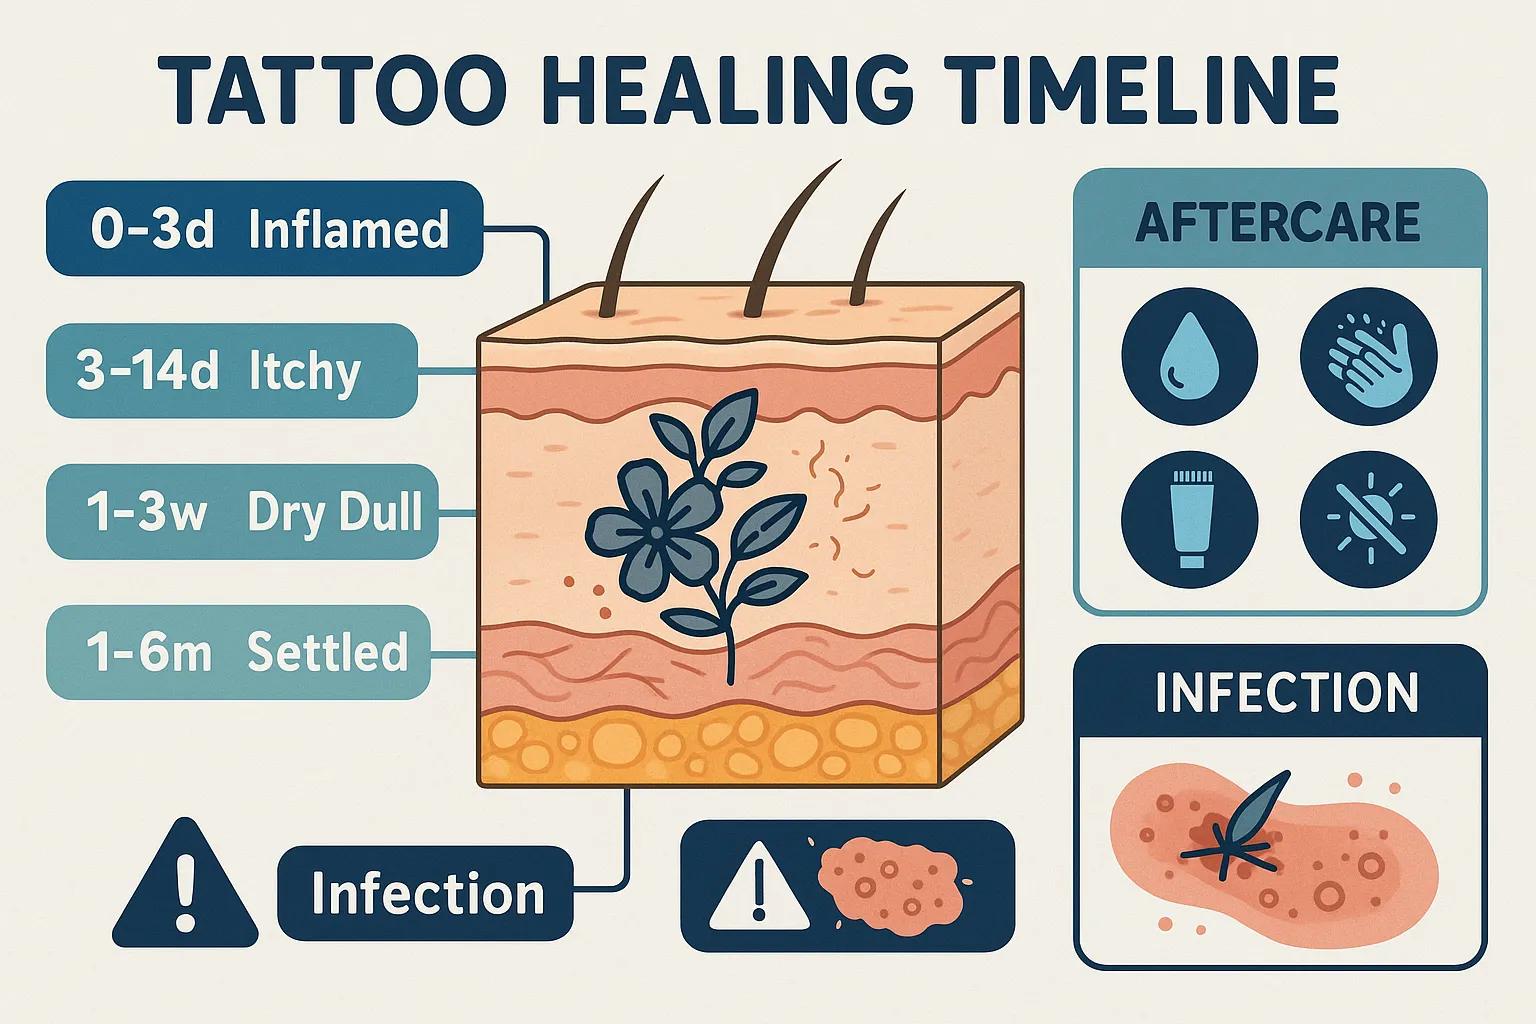
Healing follows predictable stages with recognizable symptoms; the table below pairs each stage with expected timing and practical care steps so you can easily track progress.
Healing Stage | Typical Timeline | Symptoms & Immediate Care |
Inflammation & Oozing | 0–3 days | Redness, swelling, clear plasma or a little blood. Clean gently and keep the covering as instructed. |
Surface Repair (Peeling/Itching) | 3–14 days | Flaking skin, itching, loss of shine. Moisturize lightly, don’t pick, and pat to ease itch. |
Scab Formation & Flaking | 1–3 weeks | Thin scabs or white flakes and dulling color. Continue gentle hydration and avoid soaking the area. |
Dermal Remodeling & Ink Settling | 1–6 months | Minor texture changes, color deepening or settling. Keep out of the sun and maintain skin care to protect pigment. |
This quick reference highlights common symptoms and immediate care steps; understanding these phases helps you clean, moisturize, and protect the tattoo as it moves toward full recovery.
What Are the Typical Tattoo Healing Stages?
Healing starts with inflammation, moves into surface repair (peeling and itching), then scab/flake resolution, and finishes with dermal remodeling where pigment becomes permanent. In the first 48–72 hours expect soreness, redness, and light oozing — that’s normal inflammation and a reminder that cleaning and the studio’s dressing are important. As the epidermis repairs (days 3–14) you’ll see peeling and feel itching as dead skin sheds; keeping the area moist and handled gently prevents heavy scabs and protects linework. Matching your actions — cleaning, moisturizing, sun avoidance — to each phase helps prevent complications and preserves the final result.
How Does Healing Time Vary by Tattoo Size and Placement?
Size and placement matter. Bigger pieces and areas with thin skin or lots of movement need more repair and face more friction. Long sessions raise inflammation and swelling, which can extend the early stages and sometimes mean your artist breaks work into multiple sessions so tissue can recover. Extremities, joints, hands and feet usually heal slower because of motion and thinner dermis; the torso and upper arms often heal faster thanks to steadier tissue and better blood flow. Simple adjustments — extra hydration, padding or coverings where friction happens, and avoiding intense movement — can help counteract placement-related delays and keep healing on track.
What Is the Best Tattoo Aftercare Routine for Optimal Healing?
A solid aftercare routine is simple and consistent: gentle cleansing, protective moisture, no soaking or direct sun, and a gradual return to activity. Start by washing 2–3 times daily with a fragrance-free soap and lukewarm water, pat dry with a clean towel, then use a thin layer of recommended ointment for the first few days before switching to a light, fragrance-free lotion. This approach keeps moisture balanced — preventing heavy scabs while letting the skin breathe and rebuild. The numbered steps below spell out timing and frequency so you can follow a reliable plan.
Initial Bandage Care: Remove or change the studio bandage when instructed. Wash your hands and gently blot away excess fluid with clean gauze.
Clean Gently: Use fragrance-free soap 2–3 times daily for the first week, using light circular motions.
Moisturize Appropriately: Apply a thin layer of ointment for 2–4 days, then switch to a fragrance-free lotion 2–3 times daily until fully healed.
Protect from Soaking and Sun: No pools, baths, or direct sun for at least two weeks. Use clothing or a physical cover outdoors.
Resume Activities Gradually: Wait 1–2 weeks before light exercise that doesn’t cause heavy sweating on the area; avoid heavy friction until the surface is healed.
These steps represent what most artists recommend — consistent care supports surface healing and sets the stage for proper dermal settling.
Here’s a concise aftercare checklist mapping each step to timing and product types to keep nearby for reference.
Aftercare Step | How-To | Frequency / Product Types |
Washing | Fragrance-free soap, lukewarm water, gentle motions | 2–3× daily; mild cleanser |
Early Moisture | Thin layer of ointment to protect the barrier | First 2–4 days; small amount |
Transition Moisture | Fragrance-free lotion to hydrate without trapping moisture | 2–3× daily until healed |
Protection | Cover from sun and avoid soaking | Maintain until dermal healing; use physical cover outdoors |
This step-by-step map makes it easy to follow a staged routine and know when to move from ointment to a breathable lotion; next we cover precise cleaning and moisturizing techniques.
How Should You Clean and Moisturize a New Tattoo?
Cleaning a new tattoo is about calm, deliberate care: wash your hands, rinse the area with lukewarm water and fragrance-free soap, then pat dry with a soft, clean towel or sterile gauze to avoid irritation. After drying, apply a very thin layer of a recommended ointment for 48–96 hours to keep a protective moisture barrier — too much product can suffocate the wound and prolong ooze. Once peeling starts, switch to a light, fragrance-free lotion to keep skin supple without encouraging heavy scabbing. Always use clean hands to apply products, avoid scrubbing or exfoliants, and skip tight clothing that rubs the area.
What Activities Should Be Avoided During Tattoo Healing?
Some activities raise the risk of infection or fading — steering clear of them helps keep your tattoo intact. Don’t soak the tattoo in baths, pools, hot tubs, or natural bodies of water for at least two weeks; prolonged moisture and bacteria can cause infection and lift pigment. Avoid direct sun and tanning beds until the skin is healed; UV exposure breaks down pigment and interferes with collagen remodeling. Cut back on intense workouts that cause heavy sweating around the tattoo and don’t wear tight, friction-prone clothing for two to three weeks to prevent scab displacement and color loss.
Following these activity limits protects the fragile repair phase and helps the tattoo move smoothly toward full dermal healing. Next, we’ll cover how to spot and prevent infections.
How Can You Recognize and Prevent Tattoo Infections?
Telling normal healing from infection is important: usual healing has short-lived redness and light oozing; infection shows worsening redness, pus, spreading warmth, or systemic symptoms. Prevention focuses on sterile technique, careful cleaning, keeping products and hands clean, and avoiding prolonged moisture. Early recognition gets you the right help sooner and prevents bigger problems; below are common infection signs and guidance on when to seek medical care.
Normal Healing | Infection Indicators | Preventive Action |
Mild redness that fades in days | Persistent or worsening redness after 5 days | Keep hygiene up; see a clinician if it worsens |
Clear or pale fluid | Thick yellow/green discharge or foul smell | Keep the area clean; seek medical care for pus |
Localized itch and peeling | Increasing pain, fever, or red streaks | Avoid soaking; contact a health provider and your studio |
Use this comparison to separate expected symptoms from red flags and to take quick preventive steps before escalation; next we outline common infection signs in more detail.
What Are the Common Signs of an Infected Tattoo?
Signs of infection include rising localized pain, spreading or persistent redness, warm swelling, thick yellow or green discharge, and sometimes fever or chills — unlike normal healing, which improves each day. A foul smell or red streaks radiating from the site (lymphangitic streaking) needs prompt medical attention. If pus or systemic symptoms occur, gently clean the area, avoid home topical antibiotics unless a clinician tells you to use them, and contact a medical professional for assessment. Early care often prevents more serious treatment and speeds recovery.
When Should You Seek Medical Attention for Tattoo Complications?
Get medical care when symptoms go beyond routine healing: high fever, expanding redness that crosses tissue borders, ongoing or growing pus, rapidly worsening pain, or signs of systemic illness call for urgent evaluation. For milder but persistent concerns — redness that doesn’t improve after five to seven days or an odd odor — contact a healthcare provider and let your tattoo studio know so they can advise. Treatment might include oral antibiotics, focused wound care, or, rarely, drainage. When in doubt, contacting both a clinician and your artist gives practical next steps and tailored aftercare guidance.
How Can Pain and Discomfort Be Managed During Tattoo Healing?
Pain and discomfort are normal: intensity is highest during early inflammation and falls as the surface repairs, while itching shows up during peeling. Manage symptoms with local measures and safe OTC pain relievers, avoiding anything that could slow healing. Short cold-compress sessions reduce swelling and soreness; elevating the area helps when practical. The sections below explain expected pain patterns, safe relief options, and precautions to avoid making bleeding or bruising worse.
What Are the Expected Pain Levels Throughout Healing Stages?
Expect sharper pain and stinging in the first 24–72 hours when inflammation peaks, with tenderness as the epidermis repairs; itching usually starts during peeling around days 4–14 as nerves recover. Pain should steadily decline as swelling eases and the skin re-forms a barrier. If pain increases after the first week, that’s a warning sign for infection or another reaction. Rest, gentle cleansing, and short-term measures like cool compresses usually offer relief; tracking this pattern helps you know when to get professional follow-up.
Which Pain Relief Methods Are Safe and Effective?
Over-the-counter options like acetaminophen or ibuprofen relieve pain and reduce inflammation when you follow label directions. Use cold packs for 10–15 minutes several times a day to ease swelling and numb superficial nerves — always wrap the pack in a clean cloth so it doesn’t touch the tattoo directly. Avoid aspirin around the procedure if you’re worried about bleeding, and don’t use unapproved numbing creams without artist approval, since some products can delay healing or cause reactions. These steps balance comfort with a healthy healing environment.
What Are the Recommended Tattoo Aftercare Products?
Pick products that support barrier repair without trapping bacteria or irritating skin: an early ointment for protection, then a breathable, fragrance-free lotion for hydration. Ointments create an occlusive layer in the first inflammatory days to reduce fluid loss; lotions hydrate during peeling and remodeling without macerating the area. The short table below outlines pros and cons so you can transition safely from ointment to lotion; after that, we list practical product suggestions commonly used by Phantom Avenue artists.
Product Type | Pros / Cons | Best For / Notes |
Ointment (petrolatum-based) | Pros: strong barrier and protection; Cons: heavy, may trap fluids | Best for the first 48–96 hours to shield fresh ink |
Fragrance-free Lotion | Pros: breathable and hydrating; Cons: too early use can reduce protection | Best for the transition phase after peeling begins |
Antimicrobial Soaps | Pros: surface cleaning; Cons: harsh soaps can dry skin | Use mild, fragrance-free options for washing |
This comparison explains why a staged product approach works best; below are concise, practical suggestions Phantom Avenue artists commonly recommend (not endorsements) to help you shop wisely.
What Are the Benefits of Ointments Versus Lotions?
Ointments give an occlusive barrier that protects a fresh wound and limits moisture loss in the earliest phase, helping the epidermis close. Lotions are lighter, absorbent, and restore hydration during peeling and remodeling without suffocating the skin, which reduces heavy scabbing and helps pigment settle evenly. The typical switch is from ointment for 2–4 days to a fragrance-free lotion after peeling begins, adjusting for how your skin reacts and your artist’s instructions. Knowing when to switch prevents maceration or prolonged ooze that can blur lines and harm color.
Which Brands Do Phantom Avenue Artists Recommend?
Phantom Avenue artists favor fragrance-free, hypoallergenic products designed for sensitive or wound-care skin; they prioritize texture, clinical tolerability, and consistent results. Common picks include lightweight, non-comedogenic lotions for transition care and simple petrolatum-based ointments for the very first days. If you’re in Edmonton, ask your artist which specific product they prefer for your skin type and placement — artists often provide tailored aftercare advice at the end of your session. These studio-tested suggestions help you choose practical, reliable options.
What Are the Most Frequently Asked Questions About Tattoo Healing?
Below are quick, practical answers to common concerns — itching, scabbing, picking, and more — so you can act confidently while protecting your tattoo. Each Q&A explains why a symptom happens, what to do, and when to contact a pro. If an issue won’t settle, book a consultation with your artist or see a medical professional for personalized care.
Why Is My Tattoo Itching and How Should I Respond?
Itching is a normal sign of epidermal repair as nerve endings recover and dead skin flakes loosen; it usually peaks during peeling and means healing is underway, not that it’s infected. Soothe it by patting gently, applying a thin layer of fragrance-free lotion to reduce dryness, and resisting the urge to scratch or pick — tearing new skin can cause scarring or infection. If itching comes with increasing pain, spreading redness, pus, or fever, get it checked — that could signal an allergic reaction or infection. Keeping the area clean, hydrated, and free from friction usually resolves normal itch within days.
How Can You Differentiate Between Scabbing and Peeling?
Peeling is light flaking of dead epidermis during normal surface repair. Scabs are thicker, darker crusts that can form when the wound dries out or is overly traumatized and may indicate improper moisture balance. For peeling, moisturize and let flakes come off naturally. If scabs form, don’t pick and keep the area hydrated; watch for hard, persistent scabs that trap pus or affect color. Thick scabs or patchy healing may need a touch-up from your artist, and signs of infection should prompt clinical review. Letting the skin heal naturally while following aftercare reduces the chance you’ll need corrective work.
If you want personalized aftercare or something doesn’t look right, Phantom Avenue’s international team of artists in Edmonton offers tailored aftercare instructions and can consult via online booking, email, or phone to assess complications or arrange follow-up. Our artists focus on custom body art and practical, studio-informed aftercare that complements the general guidance above.

Comments